
Elysian Stormtrooper - Warhammer 40k
Uniform
 |
 |
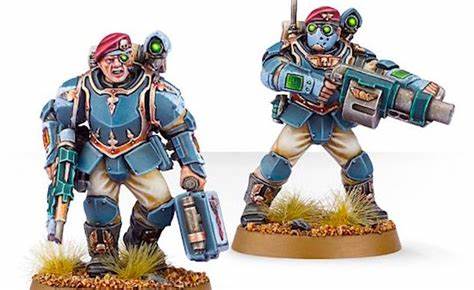
Tempestus Scions. Official miniatures. |
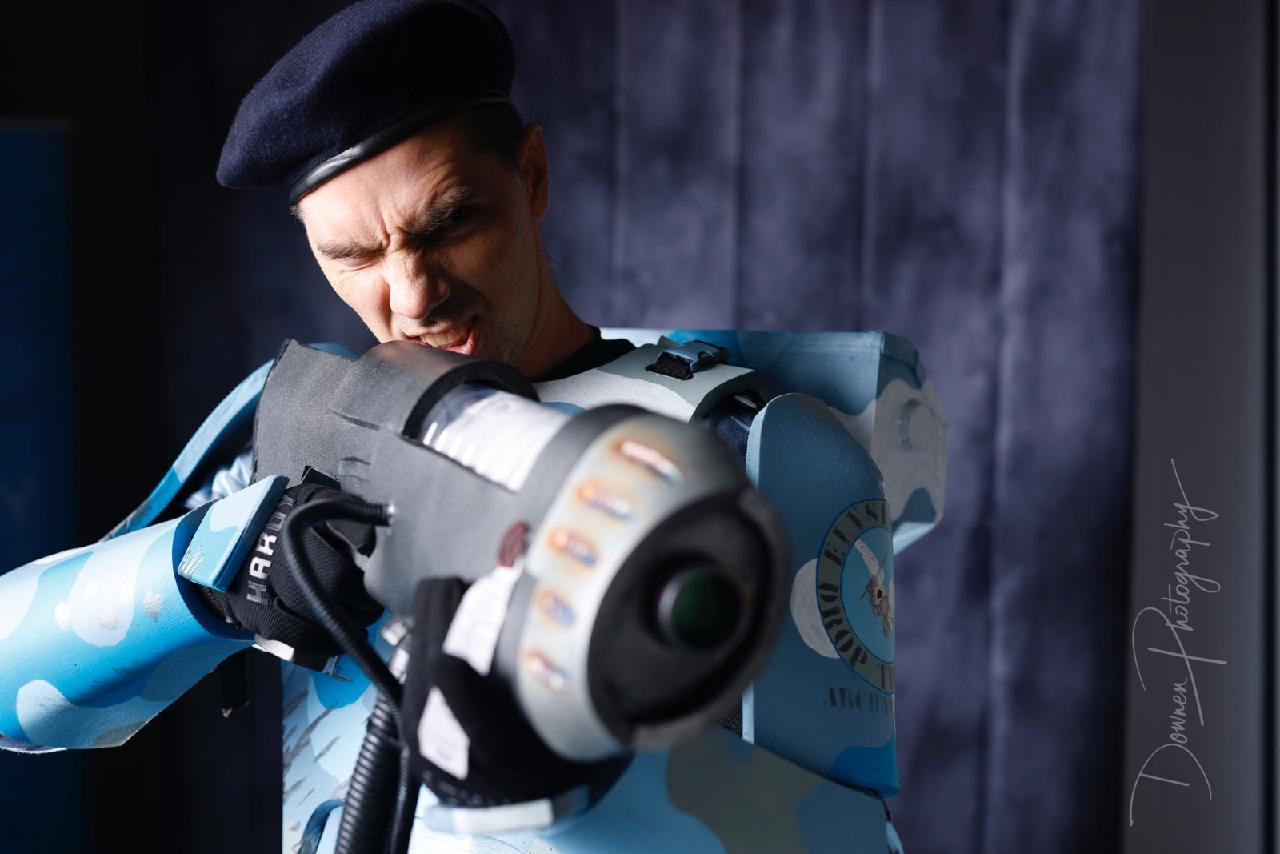
Me! Cosplay America 2023 (photo courtesy of Downen Photography). |
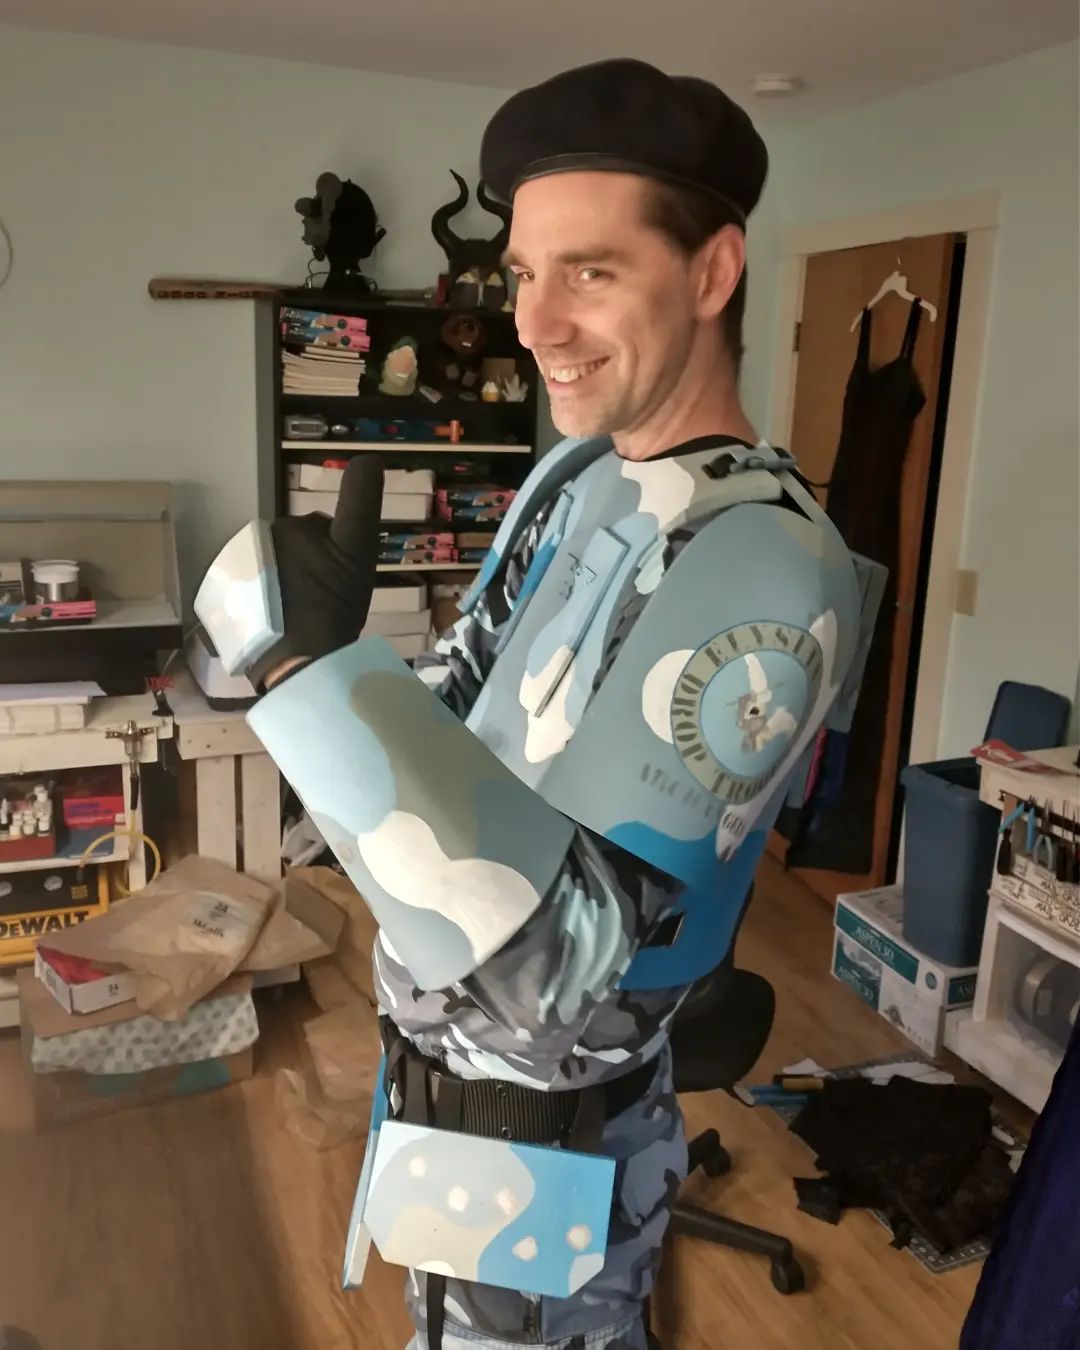
The blue camoflauge shirt and BDU pants, as well as the navy blue beret, black pistol belt, black mechanics gloves, and combat boots were all purchased. The pewter-cast dogtag was made by an old friend of mine, 'Commissar Woods'.
Armour
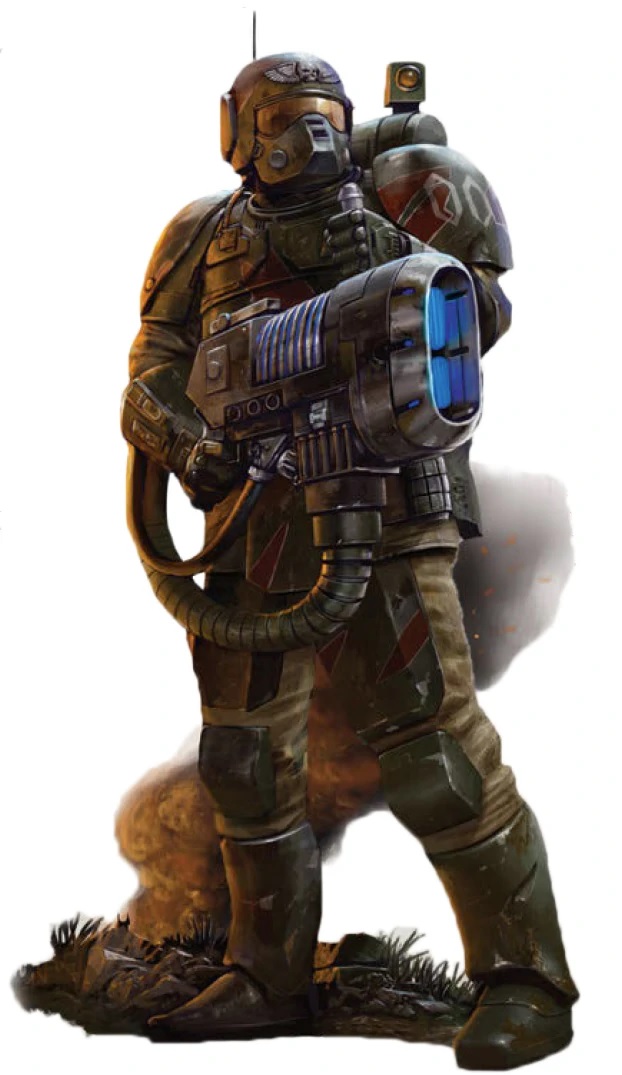
The body armour for this build is closely modeled on the "Kasrkin" miniatures produced by Games Workshop, since these were the minis that I used to represent the stormtroopers in my old Elysian army. I left out the helmet, and instead wear a beret, since I was also using the first-edition stormtroopers in that army to represent many of my officers and elite units. If the "Tempestus Scions" models had been available at that time, I most certainly would have used them instead of the "Kasrkin" (since they combine both elements), but I chose to remain faithful to the original design.
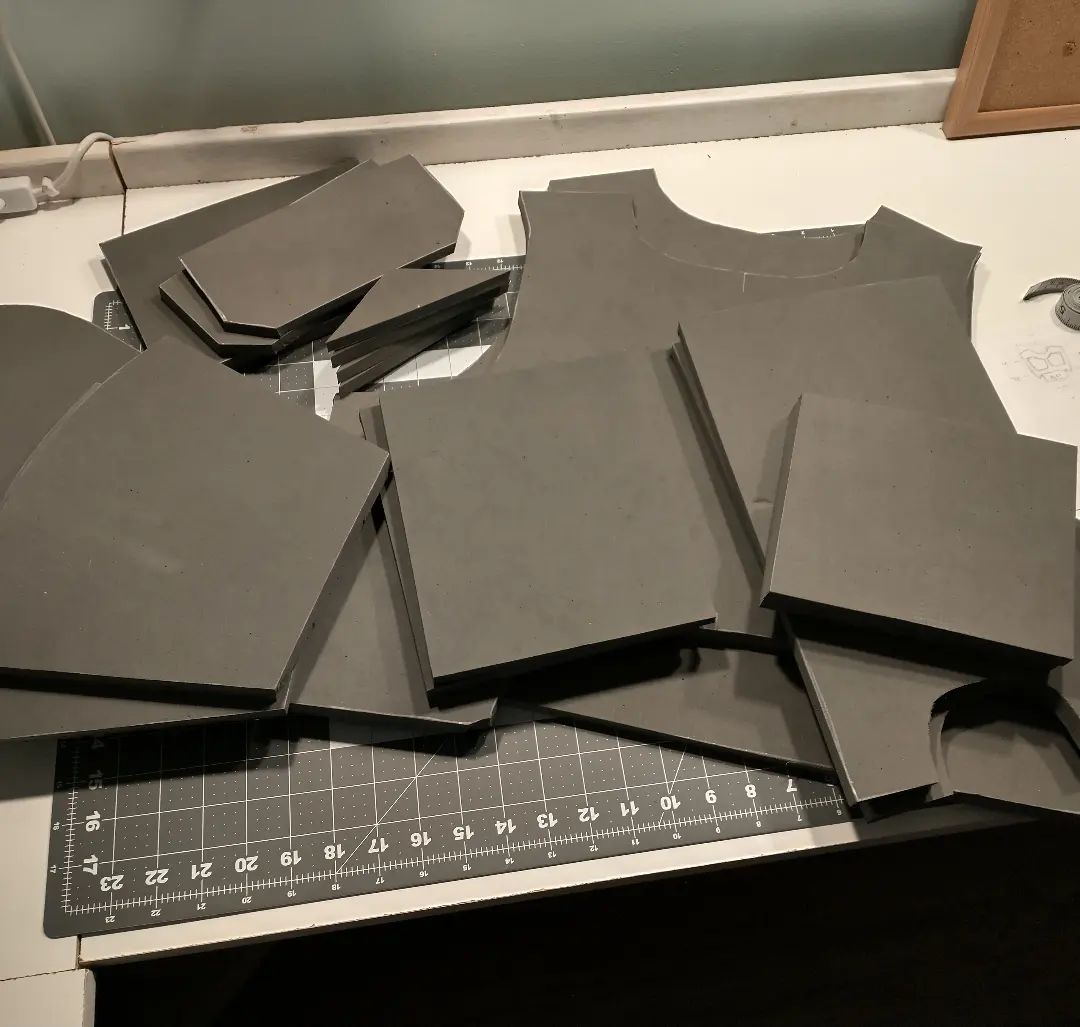
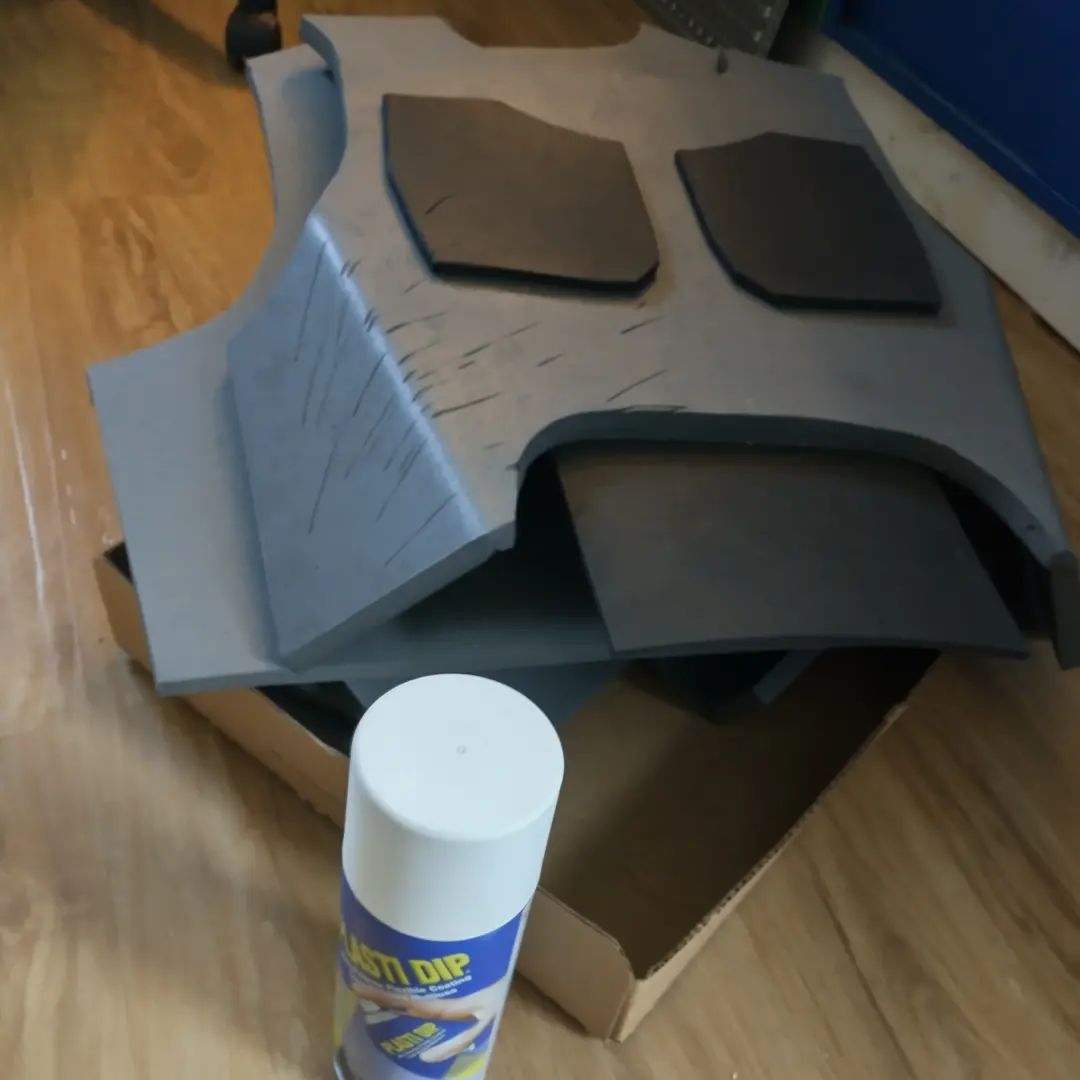
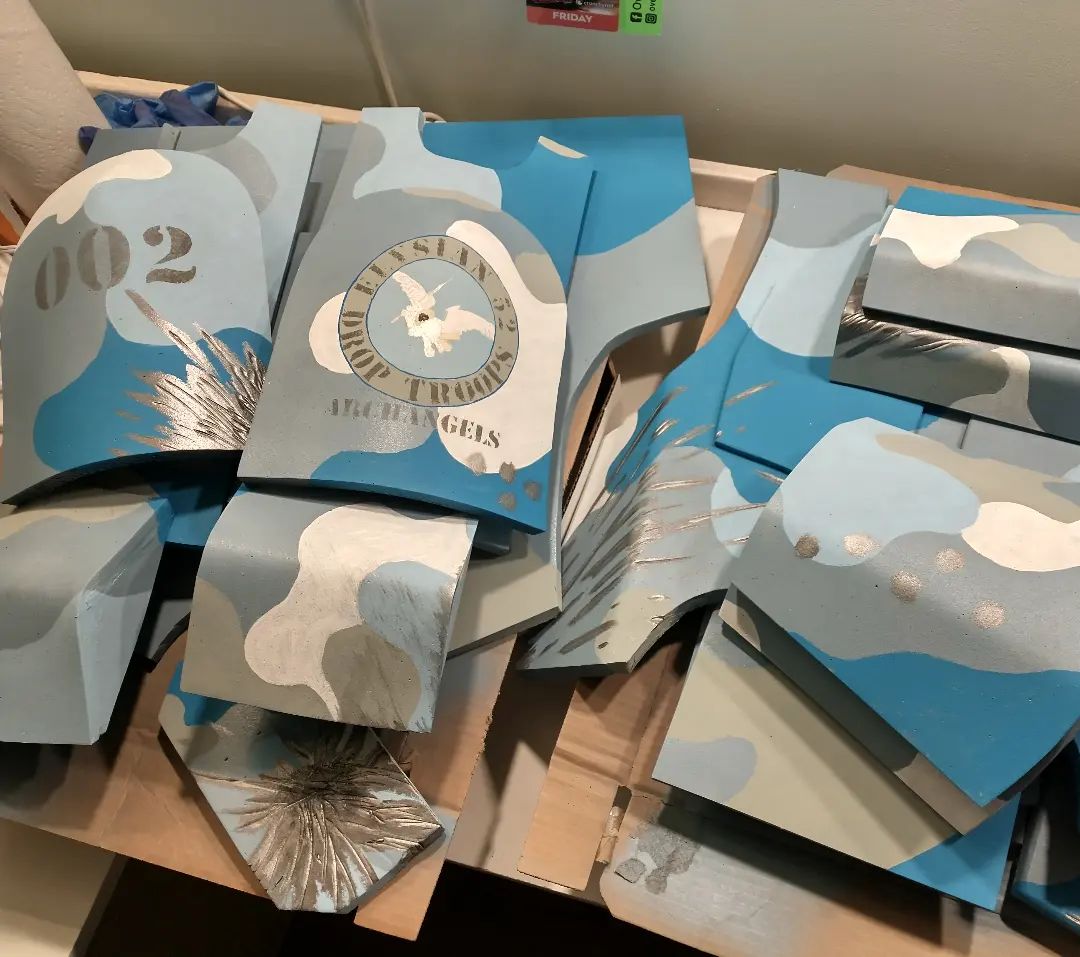
I began by working out templates for each of the pieces of armour: greaves (with incorporated knee cops), thigh plates, skirting plates, shoulder pauldrons, vambraces, gloves, and chestplate. I recorded a series of videos demonstrating this process for others to use for their own projects. After that, all pieces were cut from EVA foam and assembled with Surebonder Cosplay Stix hot glue - which was a trial for me since I would normally have used contact cement for this process. Parts were then Plastidipped, 3D-printed insignia were affixed (I modified a file by Cheesy_Chips on Thingiverse), then primed and painted. Where needed, oval grommets were installed and then buckles and straps were added!
Notable Materials: EVA foam, nylon strapping, buckles, Surebonder Cosplay Stix, PLA filament, acrylic paints.
Notable Tools: High-temp hot glue gun, Dremel rotary tool, Ender3 FDM printer.
 |
 |
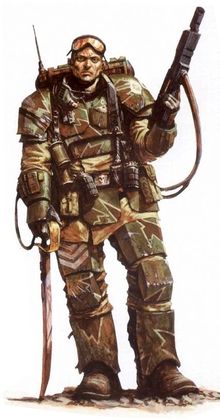
Kasrkin officer. Official art. |
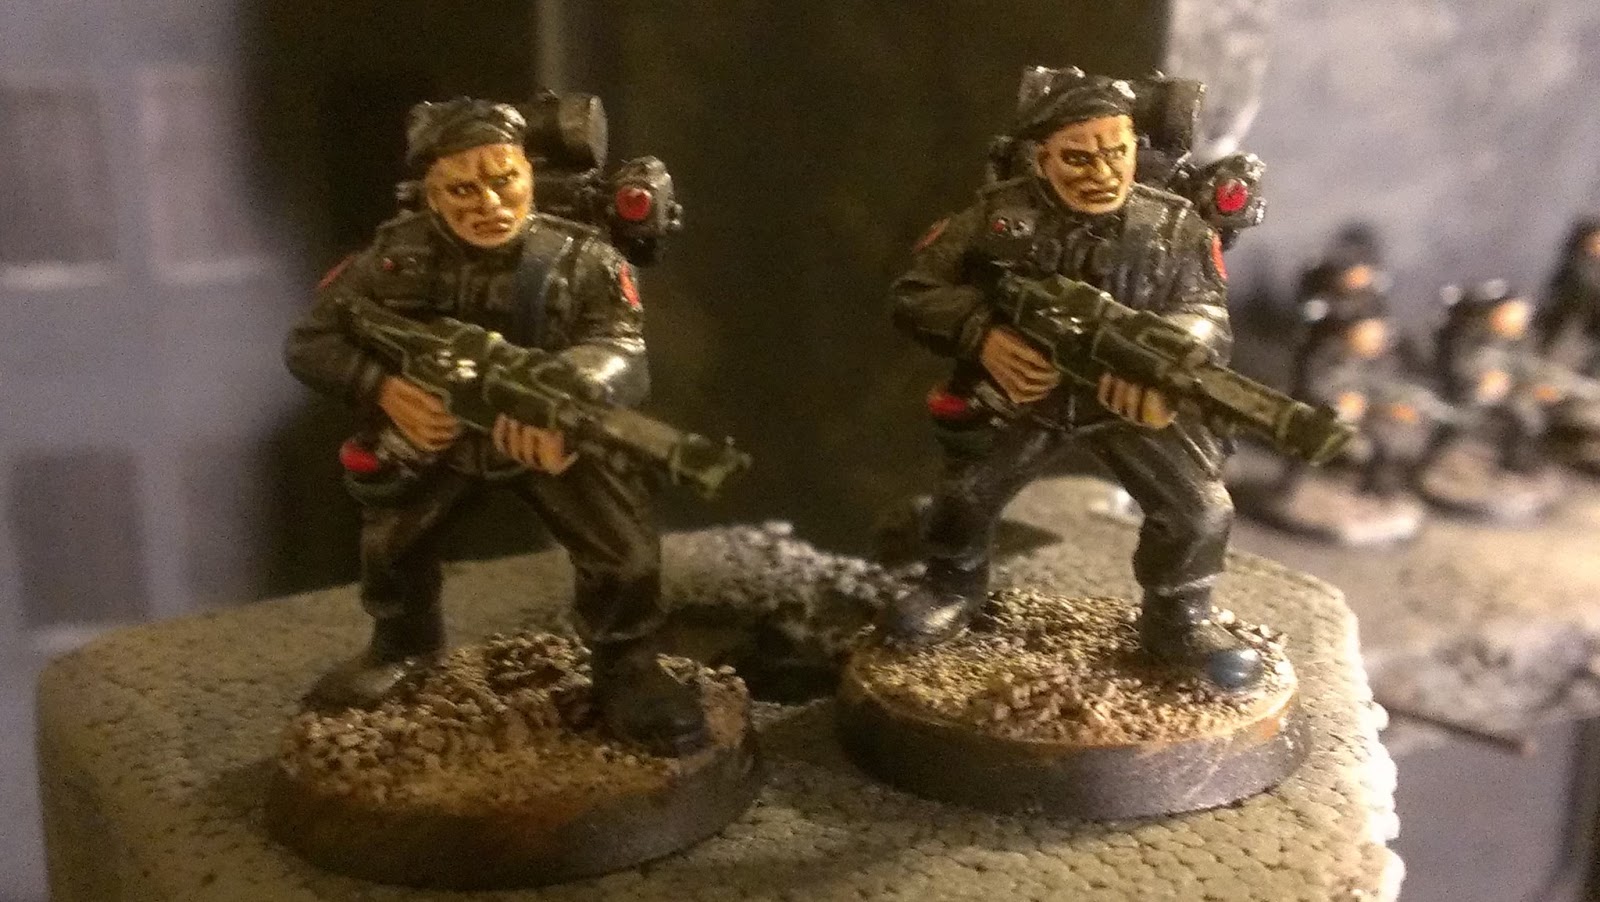
First edition stormtrooper minis. |
 |
 |
 |
 |
Armour - all cut out! |
Armour - assembled. |
Armour - painted. |
Armour - test fitting. |
Plasma Rifle and Power pack
 |
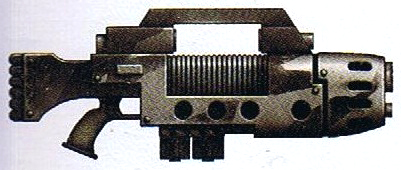 |
Accatran pattern plasma rifle. Official art. |
|
 |
|
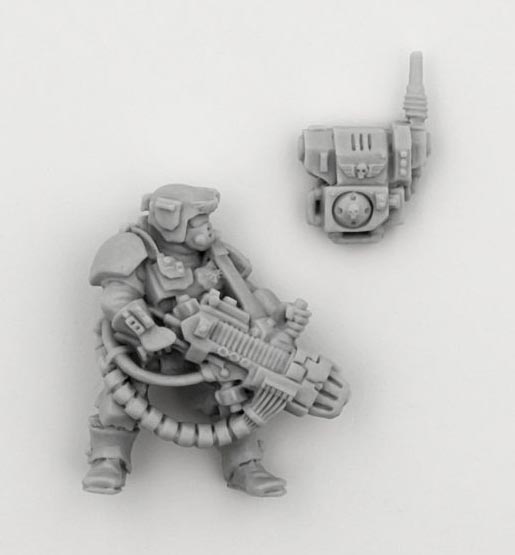
Kasrkin plasma gunner. Official art. |
Kasrkin plasma gunner mini. |
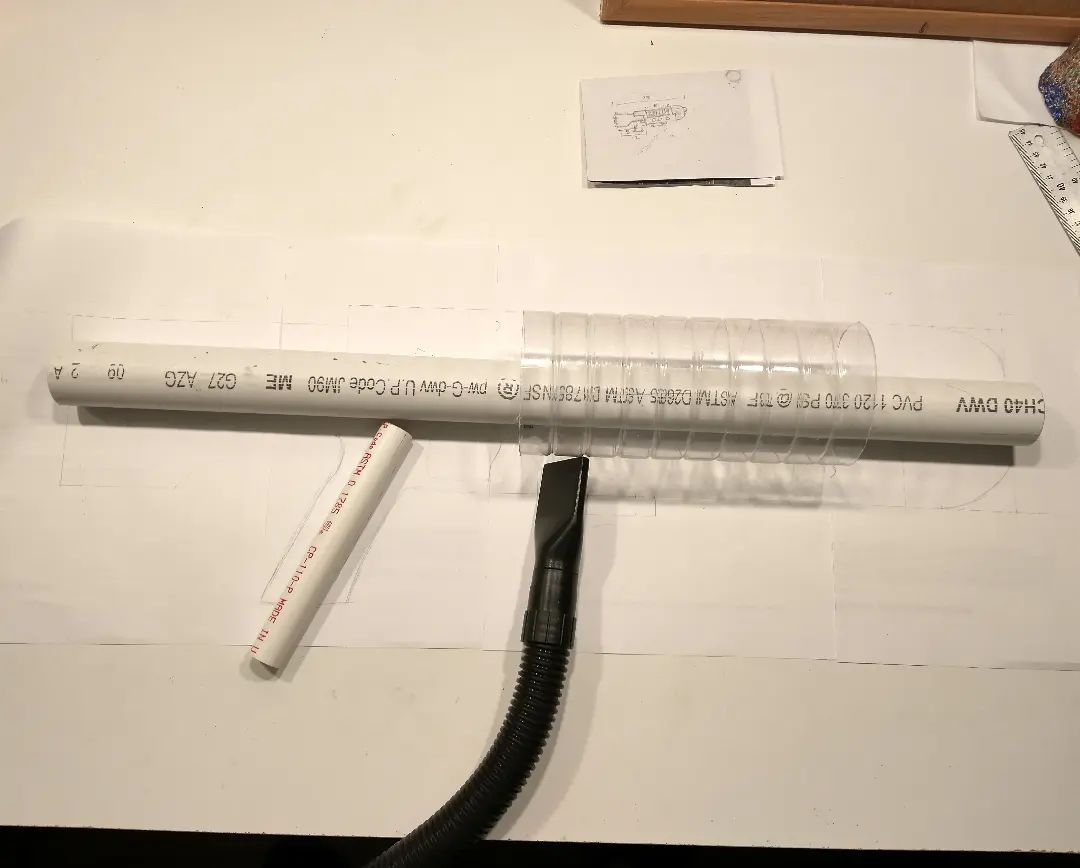
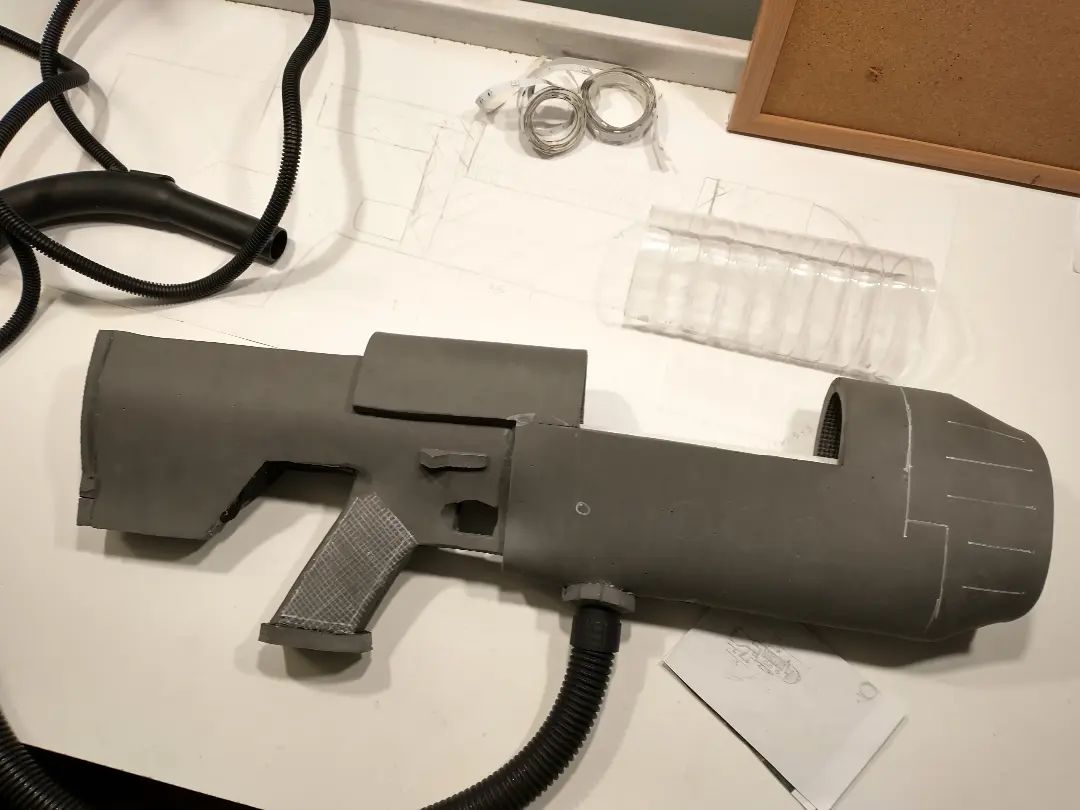
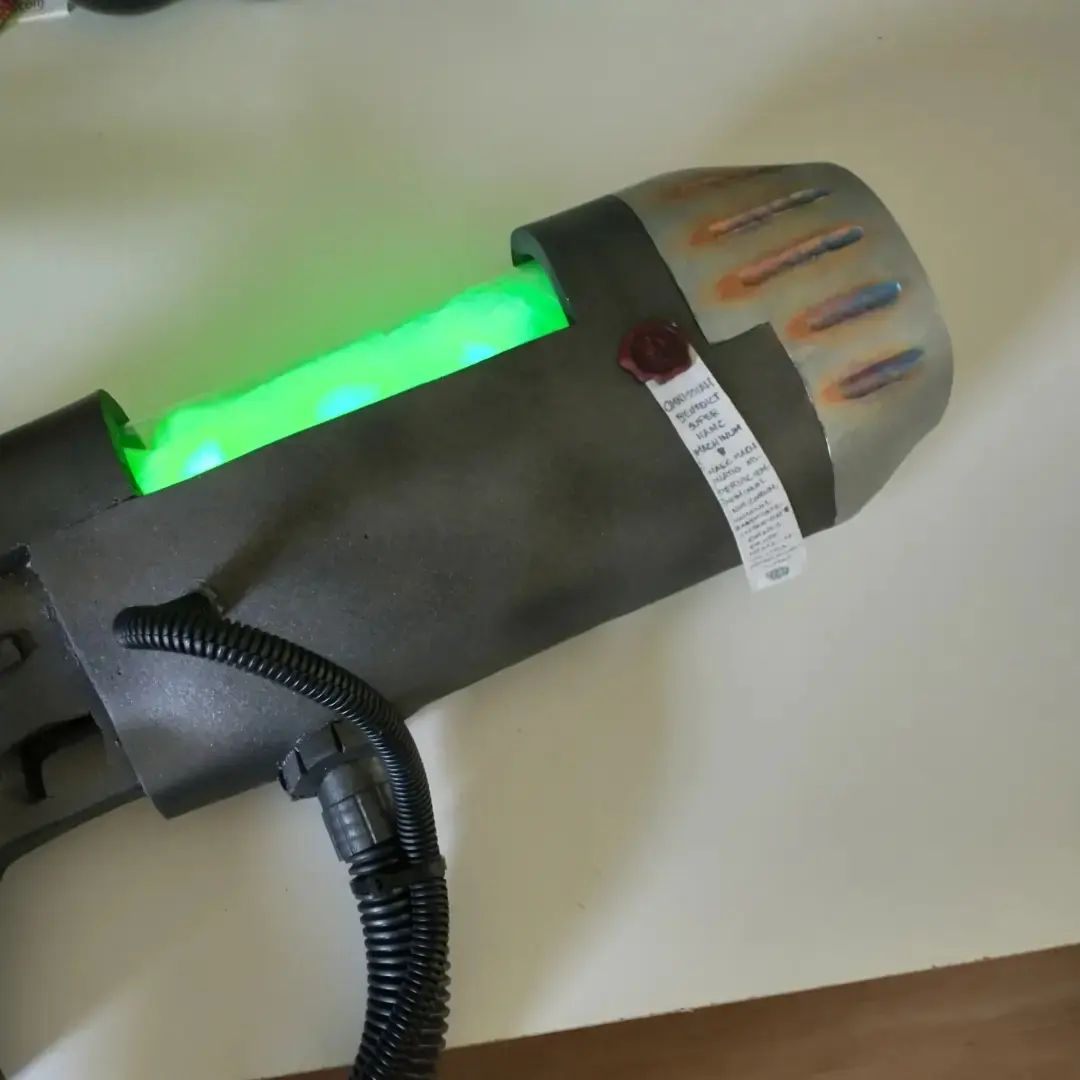
There are many variations of the plasma rifle throughout the Warhammer 40k universe. I decided that I did want something more closely resembling the "Accatran pattern" blaster since this is what is typically used by the Elysian Drop Troops, but it also needed to connect to a backpack-style power pack like all Stormtrooper weapons through all versions of these minis and art. I started with a scale sketch, then made a PVC skeleton to build from. The vacuum cleaner hose was attached to the PVC next and then I started building up the main shapes with EVA foam. A hinge was included in the butt-pad so that I can access the end of the PVC pipe for the electronics. Once the foam body was complete it was heat sealed and Plastidipped. At that point I wired up a piece of LED strip lighting and a single LED that is embedded in a piece of foam that plugs the PVC barrel. All of this connects to a 9v battery that is accessible through the butt-pad of the prop. Then the prop was painted! Lastly, the cavity above the LEDs was filled with diffusive foam and capped with a clear piece of heat-formed plastic.
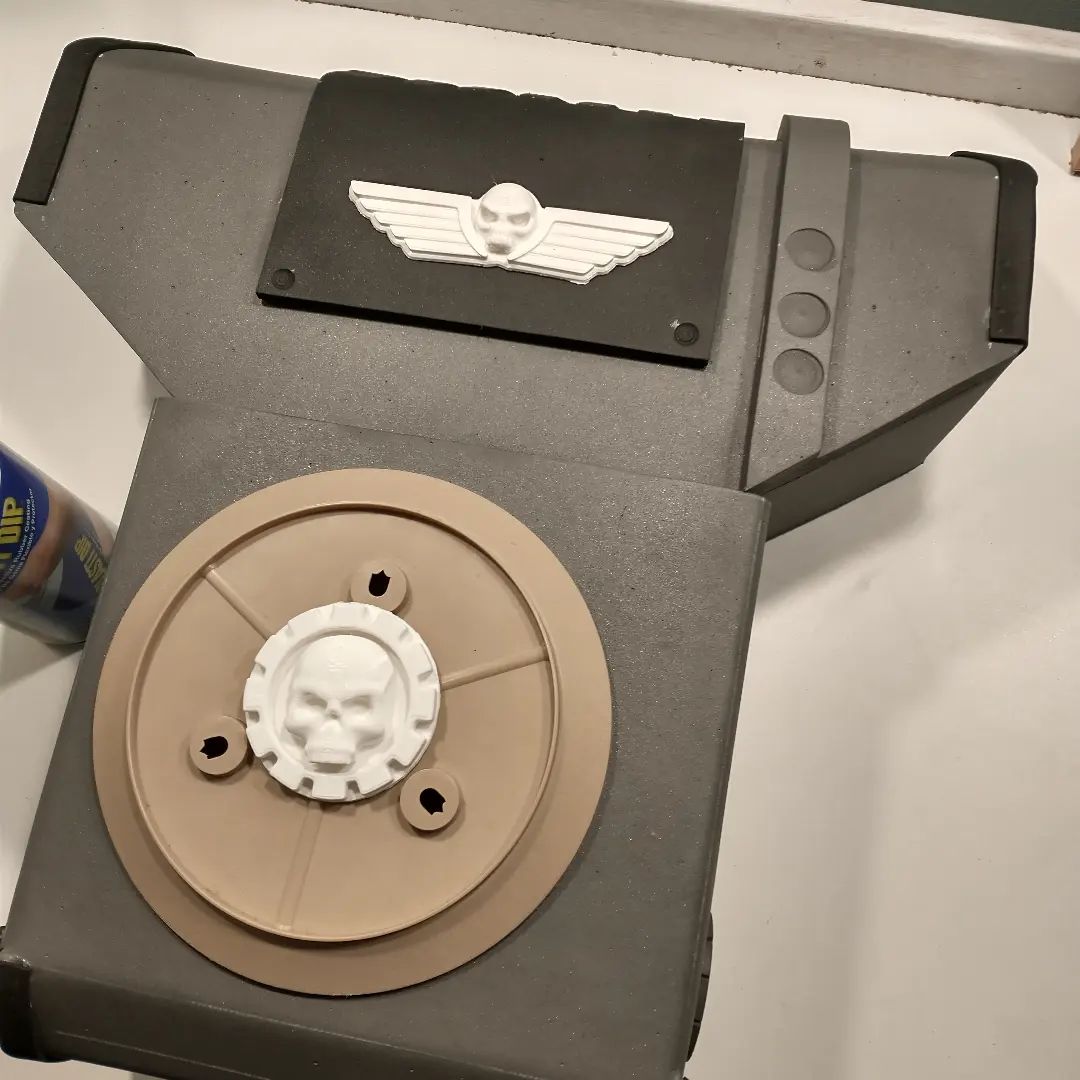
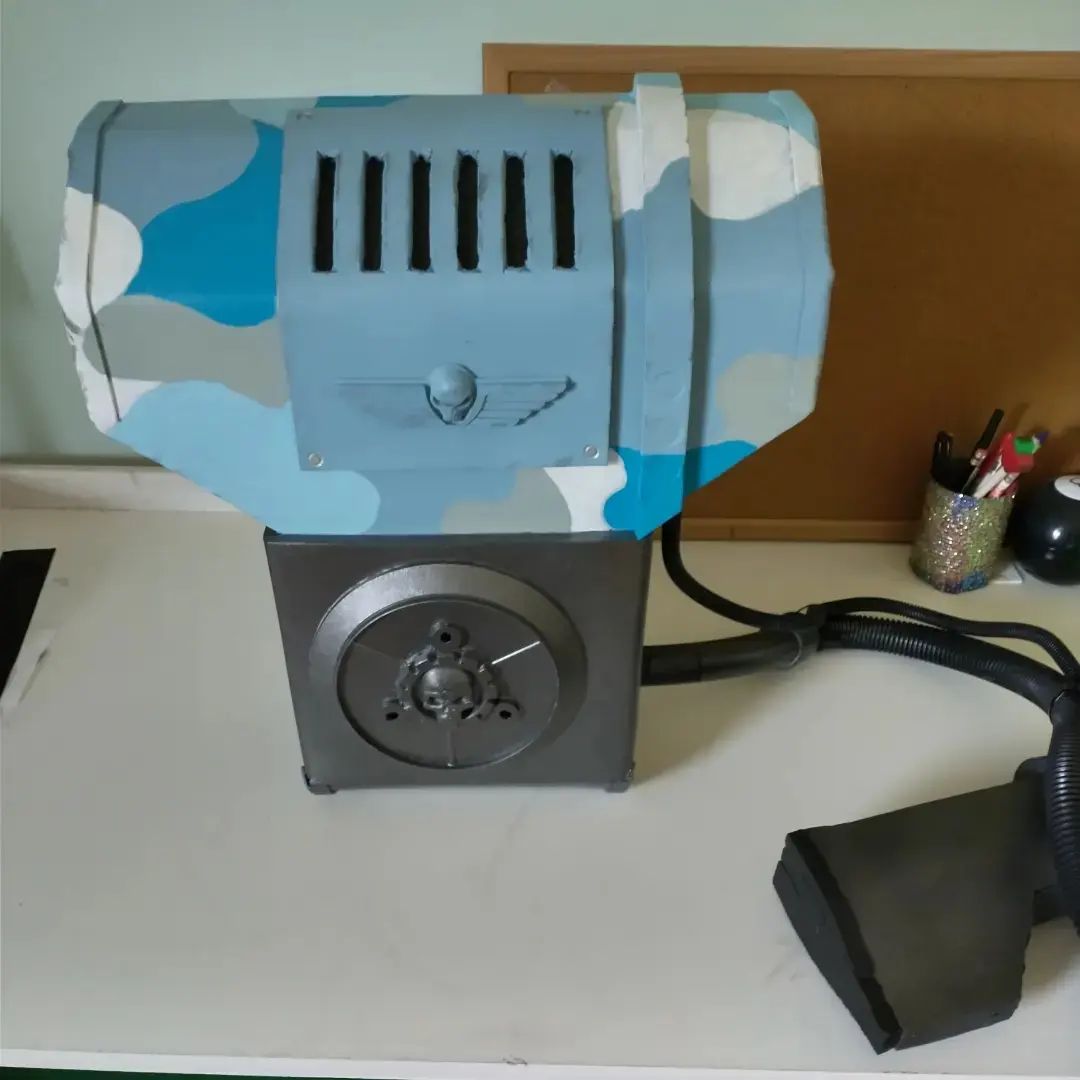
Building the power pack was fairly straight forward. I built up the shapes with EVA foam, then added details with foam, 3D printed insignia (one by Peachpunk and another that I modified from Marcusstratus on Thingiverse), and assorted plastic bits. It was then Plastidipped, painted and sealed. The pack has a slot that fits onto a tab affixed to the back of the body armour.
Notable Materials: EVA foam, PVC, assorted plastic bits (including a vacuum cleaner hose), LEDs, diffusive foam, Surebonder Cosplay Stix, PLA filament, acrylic paints.
Notable Tools: High-temp hot glue gun, Dremel rotary tool, Ender3 FDM printer, soldering iron.
 |
 |
 |
 |
 |
 |
Plasma rifle - PVC skeleton over sketch. |
Plasma rifle - foam constructon complete. |
Power pack - basic shape built. |
Power pack - foam construction complete and plasic bits placed. |
Power pack - complete. |
Plasma rifle - complete. |
Accessories
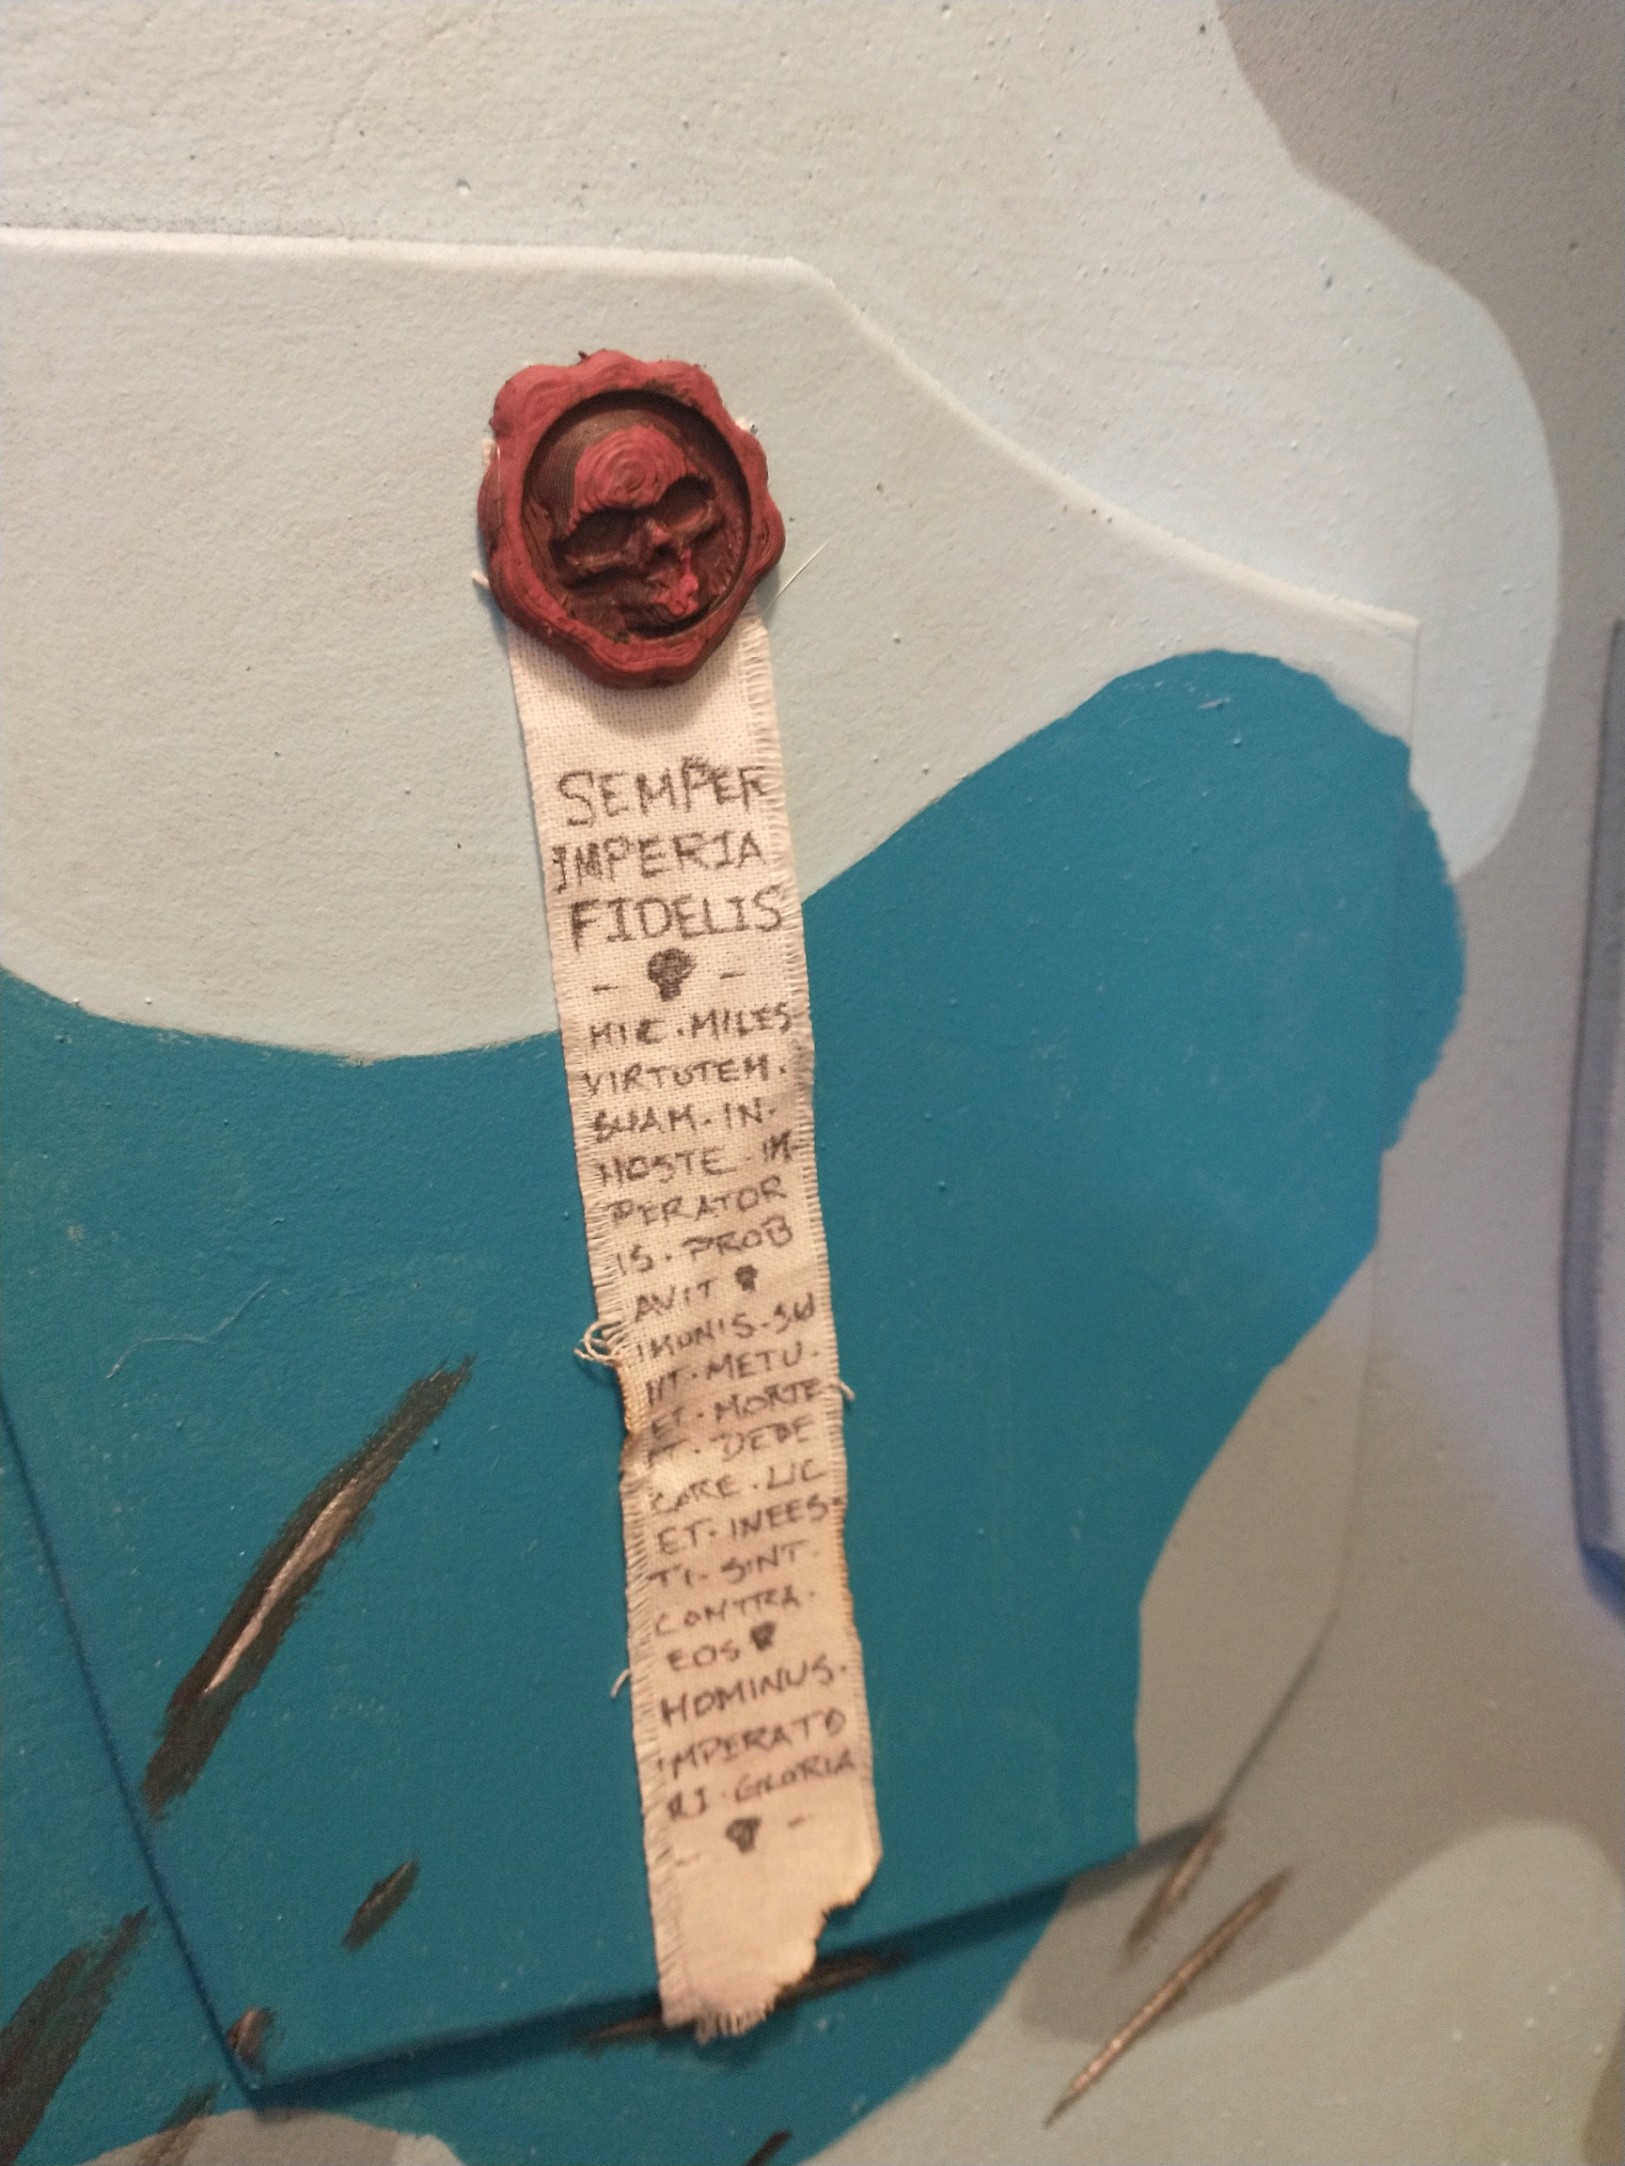
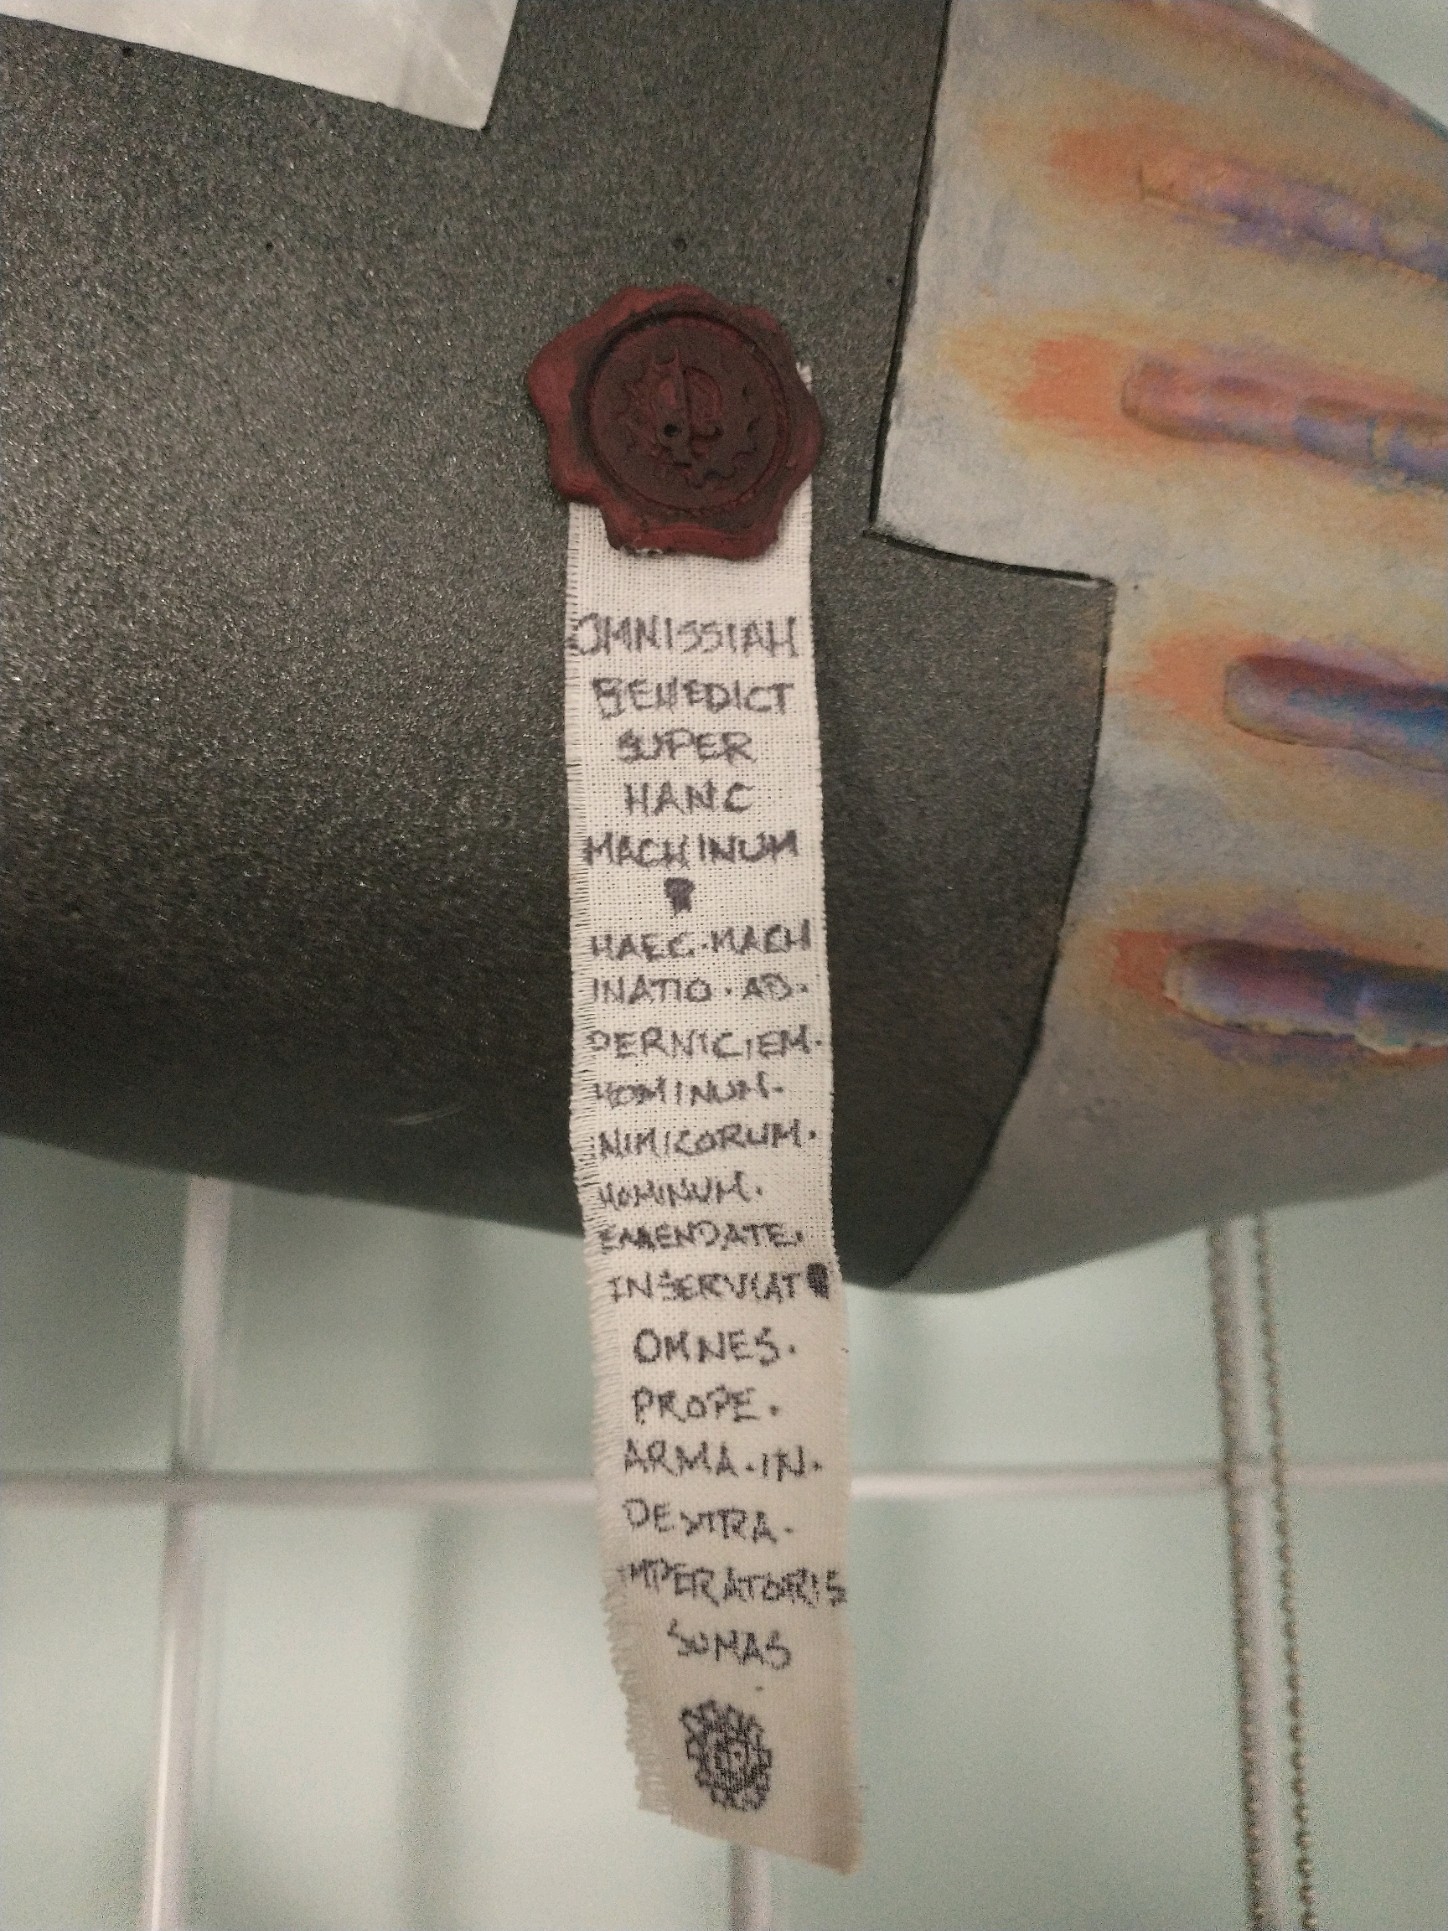
"Purity Seals" commonly designated elite troops and specialized equipment within the Imperium, so I needed at least a couple of those! The seals were 3D printed (files by Thebrakshow and Voorhees13 on Thingiverse), painted, ink washed, and sealed. The 'ribbons' were cut from cotton fabric and then I hand-scrawled the inscriptions with a fine-tipped Sharpie. I then frayed the edges and coffee-stained them to make them look worn.
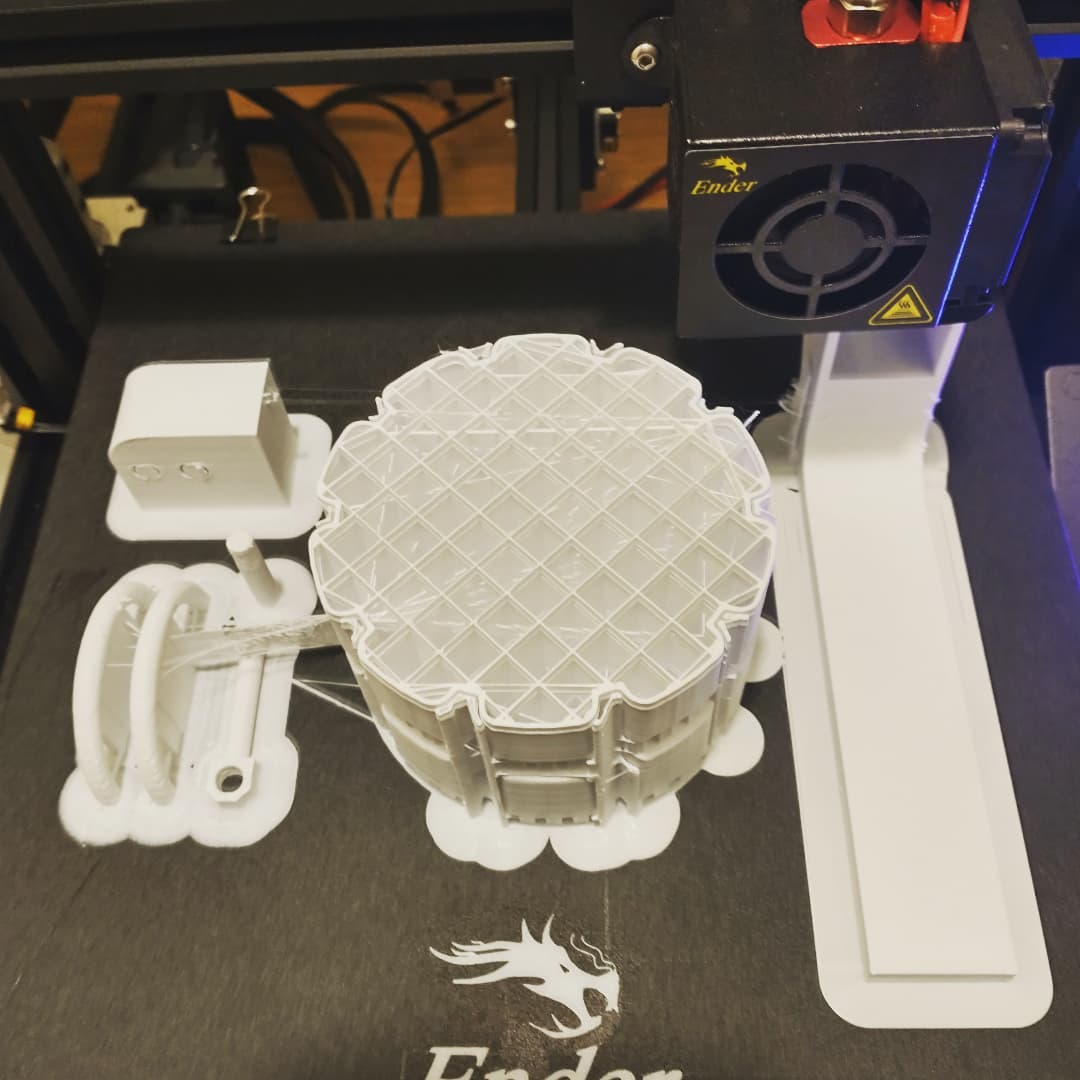
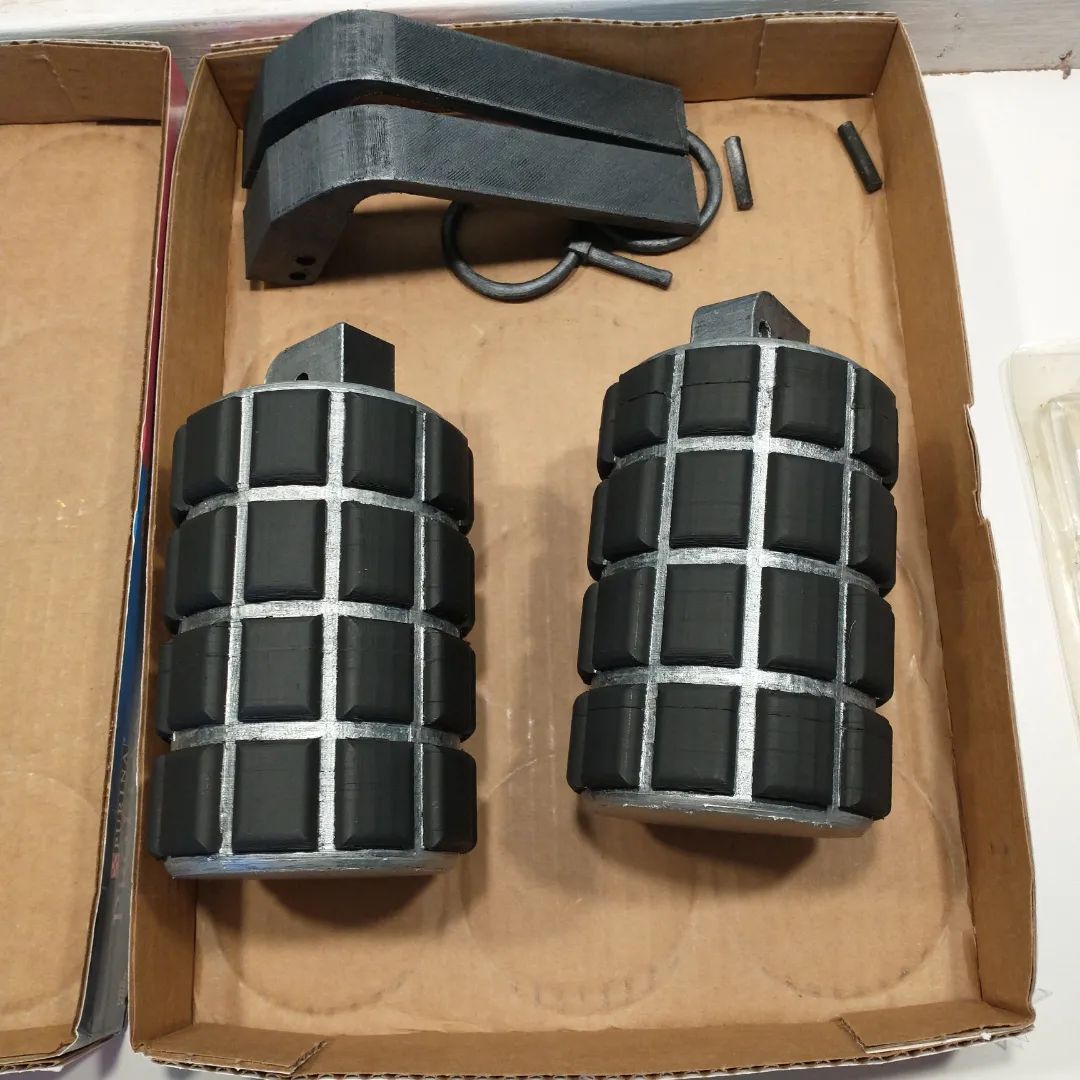
Grenades were 3D printed (files by BiancaW on Thingiverse), assembled and painted. I sewed some pouches for these with cotton duck fabric.
Bolt pistol was modified from a decommissioned NERF blaster with additional 3D printed parts (files by Z0r4n on Thingiverse) and painted. I sewed a holster for this with the same cotton duck as the grenade pouches.
Combat knife was 3D printed (files by chris_kim on Thingiverse), assembled and painted.
Notable Materials: PLA filament, fabric, acrylic paints.
Notable Tools: Ender3 FDM printer.
 |
 |
 |
 |
 |
Purity Seal on armour - complete. |
Purity Seal on rifle - complete. |
Grenades - printing in progress. |
Grenades - painted. |
Bolt pistol - complete. |
| Made | Altered | Bought |
|---|---|---|
|
|
|